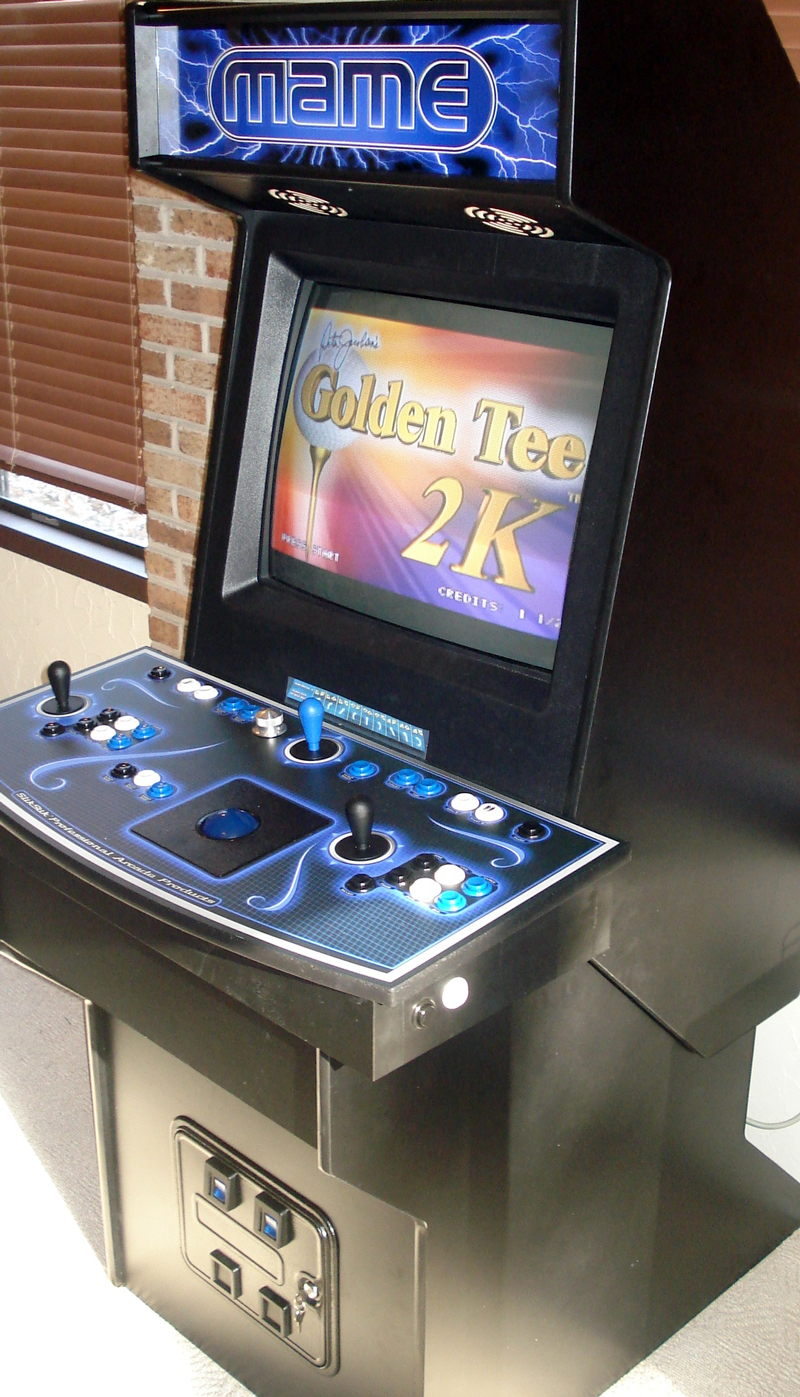
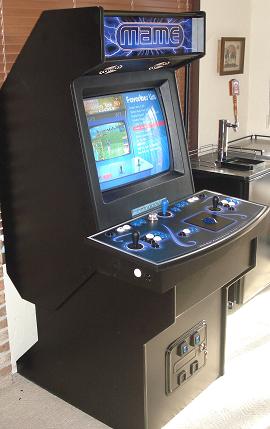
My Custom Built MAME Arcade Cabinet!
I wanted to build a home arcade machine that could play all the classic video games as well as those console favorites. I’ve played around with arcade emulators on my PC before so I knew a little bit about how it all worked. After months of researching and reading a lot of different websites, I came up with an economical plan that didn’t require too much time and the end result was a highly polished professional arcade system.
In this article I outline every component that was purchased, how much was spent, and my reasoning behind each one. I only wish I had this information when I started to build my own arcade as the majority of it was scattered throughout websites and forums. This is why I’m posting this information so you can save a lot of time and money. There are many factors to consider–You could drop $3,000 and buy a complete arcade system that plays maybe 100 games, or you could assemble your own for about half the price and play thousands of games. The choice was an easy one for me.
CLICK HERE TO PURCHASE AN ARCADE CABINET PRELOADED WITH GAMES!
1. Arcade Cabinet
The arcade machine all starts with an empty cabinet. You have some options to consider–buy a used arcade machine and gut it, buy cabinet pieces to assemble, or just buy the plans and start from scratch. I decided to go the easiest route that still gave me control over the components so I ordered pre-cut pieces. I’m no stranger to power tools, but I felt the time it would take didn’t out way the costs of just buying the pieces and assembling.
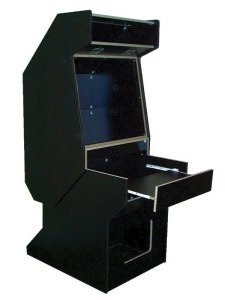
MameRoom DYI Cabinet Kit
$460 + $125 shipping
I ordered the do-it-yourself UAII cabinet kit from MameRoom Designs. The cabinet arrived in multiple boxes and were of good quality. All the parts were labeled with lettered stickers and the build instructions were easy to follow. It wasn’t all puppy dogs and ice cream, as a lot of the pieces were damaged like they had been dropped. There were a couple pieces they forgot to send and a few were duplicates. I question their QA process, however, they were really good about it and immediately shipped new pieces.
Update: MameRoom Designs was purchased by another company since this article was published.
2. Arcade Controls
SlikStik Classic Unit – $500
You can build your own controls by ordering the individual buttons, trackball, spinner, wires, and what’s called an I-PAC controller and plug it into your PC or you can order pre-built controls that fit cleanly into the cabinet and easily connect to your PC. Once again I’m no stranger to wiring things up, but I do have that full time job that cuts into my time and I actually wanted to complete this before winter.
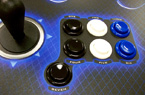
Midnight Blue Overlay – $80
I ordered the Classic Unit panel and added the midnight blue overlay. I highly recommend an overlay as it makes the controls look like a real arcade system. The painful thing is it took almost 5 weeks from when I ordered to the day it was delivered. The construction and overall quality is superb and definitely worth the wait.
The Classic Unit has has a trackball, spinner, and 2 main joysticks. They have other models available with 4 player controls too. Installation is as easy as plugging 3 USB cables into your PC. One cable is keyboard output which maps the joysticks and most buttons to regular keys, and two mouse cables for trackball and spinner knob.
Update: SlikStik has gone out of business since publishing this article
3. 27” Television

Toshiba 27″ TV
I bought a 27” Toshiba TV from a friend for $65 after spending weeks searching craigslist for one that had power-return. This feature isn’t something you hear much about but is important for a game cabinet. It means if power goes out, it will turn itself back on and to the correct channel. The reason you need this is you won’t have easy access to the power button and the bezel will cover the IR port so the remote won’t work either. The model I got also had S-Video and a high comb filter which displays graphics and text cleanly at 800×600 resolution. All the classic games look great on it.
4. PC – Dell 2.4 Ghz
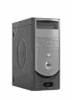
Windows PC
DELL
This was my old PC and I put a fresh install of Windows XP Home Edition on it and used an old graphics card–the ATI all-in-wonder w/ S-Video out. I tried using a newer nVidia GeForce 4 card but the S-Video on it was horrible and after reading that other people had similar issues I would suggest sticking with ATI if your buying a new card.
One thing to note is a high-end graphics card isn’t really needed as emulators use more CPU than anything else. I’d suggest going middle of the road for both your graphics card and CPU. It doesn’t take much to power these retro games from 1980.
Update: If you don’t have an old PC to use then you might consider buying a Raspberry Pi 2 which costs much less than a PC and is powerful enough to run arcade emulators.
5. Lighted Marquee

Mame Marquee – $20
The marquee was bought from Mame Marquee and featuring an awesome blue lightning effect. I think it really looks sharp and matches the midnight blue overlay on the control panel.
The Fluorescent Light Fixture was purchased from Happ Controls. It didn’t come with a plug so I had to take an old extension cord and splice it together.

Fluorescent Light Fixture – $10
Happ Controls
Plexiglas – $8
Local Hardware Store
Finally I bought two pieces of clear Plexiglas cut to fit from my local hardware store, sandwiched the Marquee in between the two pieces, and installed the light fixture behind it. The lightning bolts coming out of the Mame logo look awesome when lighted.
Update: Mame Marquee website is no longer available and Happ Controls has become Suzo-Happ.
6. Monitor Bezel
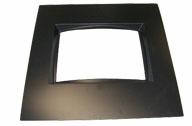
27″ Monitor Bezel
Happ Controls
Ordered the 27” Monitor bezel from Happ Controls and used a utility knife to trim to fit. This hides everything on the TV except the screen. I got lucky in that it fit perfectly against the screen and the T-molding held it in place without Velcro or tape.
CLICK HERE TO PURCHASE AN ARCADE CABINET PRELOADED WITH GAMES!
7. Sound
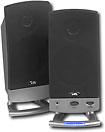
Cyber Acoustic Speakers – $30
Best Buy
I used a sub-woofer I already had and bought Cyber Acoustic Speakers to mount above the pre-cut speaker holes. Keep in mind that your arcade can also double as a jukebox, so make sure you get something that sounds decent.
I removed the screens from these speakers which revealed 6 empty holes. I took a couple screws and put them halfway into the cabinet and then slide the speakers onto the screws. It held pretty good by itself, but I also reinforced it with some good old duct tape.
8. Smart Power Strip
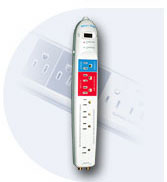
SCTG4 – $30
Smart Home USA
This is a really slick power strip that allows you to have one device be the control power for numerous other devices. For example, my PC is the control so if I power it up then the strip powers on the other devices which include the TV, marquee lights, and sound.
If I shutdown the PC then all the other devices will also shutdown. I can access the PC’s power button by opening the coin door.
9. Coin Door
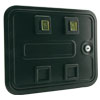
Coin Door – $55
Part# 40-0008-02
Happ Controls
The coin door was the last touch to the arcade which is just for looks and has no real function. The arcade games do require a coin to be inserted prior to playing. However, the control panel has coin buttons to trigger this event.

Blue Reject Buttons (2) – $10
Part# 42-0517-02
Happ Controls
The door was ordered from Happ Controls and came with yellow coin reject buttons. You can save money by not ordering the entire coin door system as the UAII plans state, but instead just get what you see from the outside. I have listed this part number on the right and it’s all you need.
The coin door comes with yellow buttons installed which didn’t fit my color scheme so I ordered blue buttons and swapped them out. I took an old power supply and wired up the included 14V light bulbs. It was a nice final touch to the arcade.
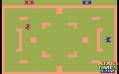
10. Game Emulators
Emulators are needed to drive your arcade games which are called ROMs. Your PC is way more powerful than the original hardware that ran all those classic games and there is a whole community dedicated towards writing emulators to play them. There are many emulators out there and what follows are my favorites:
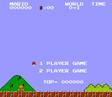
The MAME (Multiple Arcade Machine Emulator) software is probably the best known emulator in the world and plays the majority of your classic arcade games. If your running Windows, you’ll want to use Mame32 which gives a nice GUI around the MAME engine. You’ll need MAME to run games like Pac-Man, Joust, Asteroids, Donkey Kong, Golden Tee, and about 3,000 more.
Nestopia SNES Emulator – Free!
Nestopia
SNES has numerous emulators and I found Nestopia to be the easiest to get up and running. Super Mario Brothers and Zelda are games you just have to play.
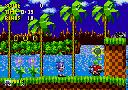
Kega Fusion Sega Emulator – Free!
Fushion
The Sega Genesis has a great emulator called Fusion. The fast paced Sonic the Hedgehog makes it a requirement to download.
Stella Atari 2600 Emulator – Free!
Stella
The Atari 2600 can be played using the Stella emulator. This console was introduced in 1977 and the games were very simple. If you remember Combat, Pitfall, and Kaboom! then you have to get it.
Daphne is an emulator that plays those classic arcade laser disc games. As a kid I remember watching others play Dragon’s Lair but I never did because it was too expensive. Now you can play as much as you like without a bankroll of quarters.
Daphne Emulator – Free!
Daphne
The ROMs (games) are very easy to find by searching Google, but remember most of them are copyright so you’ll need to check if your legally allowed to run them. 
The hardest thing to find were the laserdisc’s for Daphne. You can buy them online or use bittorrent to download the MPEG files.
Update: Mame32 emulator was renamed to MameUI.
11. Front Loader
Maximus Arcade – $25
GameEx – $25
AtomicFE – Free!
I wanted my arcade system to look like a real arcade system and not a Windows PC. This requires removing the Windows boot-up screen, login screen, mouse cursors, and background colors. It is actually possible to customize it so there is no trace of Windows. The best resource I found for doing all of this can be found here: Wiki – Hiding Windows.
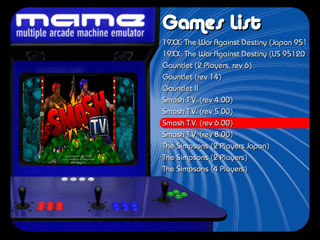
The arcade should be configured to boot directly into what’s called a front loader. Front loaders provide an easy way to select an emulator and game to play without ever seeing Windows Explorer. There are many front loaders out there, some free, some cost a few bucks, and after trying almost 20 different ones I decided on Maximus Arcade. It is very easy to configure and navigate games with a joystick or trackball. It also includes a MP3 player jukebox which is a nice feature.
The best free front loader I found was AtomicFE. Another good front loader to check out is GameEx which is far more extensive than all others but looked too much like Windows Media Center for my taste.
My Dream Arcade Machine
 I have over 7,000 different games available on my arcade system. I use the favorites menu to keep track of the ones my friends and I play the most. If I had to create a most played list it would include:
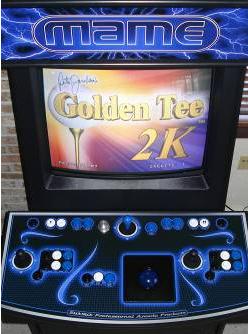
1. Golden Tee 2k
2. Berzerk
3. Track and Field
4. Hyper Sports
5. Missile Commander
6. Galaga
7. Dragon’s Lair
8. Asteroids
9. Defender
10. Super Mario Brothers 1 and 3
11. Zelda
12. Joust
13. Q-Bert
14. Pac Man
15. Ms. Pac Man
16. Centipede
17. Street Fighter 2
18. Mortal Kombat 3
19. Dig Dug
20. NBA Jam
 It’s been a lot of fun discovering coin-operated arcade games that I played as a kid and competing with my friends for the highest score. Now that it’s in my bar room next to the kegulator there has been many late nights of drinking, gaming, and tough talk.
Although this project has been completed, something tells me I’ll be tweaking it for years to come.
I highly recommend building your own arcade system. The process of building it was almost as fun as playing the games themselves. Almost. 
CLICK HERE TO PURCHASE AN ARCADE CABINET PRELOADED WITH GAMES!
NOTE: I do not recommend X-Arcade because of shady business practices. I previous signed up with their affiliate program and after sending them a ton of traffic over 6 months they suspiciously shut down the program without any notice or payment. That’s just bad business!
hi man i really like your project ,i’m kendrick and i’m an arcade engineer i fix arcade machines at my job ,and i’m working on a project like you do ,i’m working on a classic pacman cabinet that i’ve made and i can see where you’ve made a game list ,witch program did you use and how did you set it up ,i want may machine to be like your
All the links to the software I used are in the article. Let me know if you are looking for anything specific or if they are not working.
Todd I have some questions about emulators and building this machine are you still responding to this site
Email me and let me know
skulbacki@hotmail.com
Thanks
I’m not sure I’d be able to provide much more detail other then what’s in my article.
Todd, this is really cool, nice job. Would you be willing to building one for me for a fee?
So many people ask me that… sorry I barely have time to even play a game
You’ve inspired me… I’m saving your page, and starting my own in a few weeks.
Thanks!
BTW, my wife is going to hate you for this
Great! Hope you don’t get in too much trouble
Hello Todd would I be able to play games like virtua tennis on this?
Thank you
I love your game list. I’m working on my arcade machine now. I was going to use Raspberry pie 3 to do it.. I could use a windows pc also.. but I think the raspberry pie would be a fun experiment.
Do you have a linked list of all the items you used for the emulators?
Feel free to email me
Hi Todd,
Thank you so much for publishing this. I am about to embark on building my own arcade machine. 2 quick questions:
1) Would you change anything about your set up if you were to do it again? Specifically, the monitor, would it be better to get an HD Flat screen?
2.) Do you think there is a way to buy the computer with software already downloaded? While I am quite handy (carpentry/ electrical), I am not so good at programing/ computer software.
Thank you!
I’ve been wanting to post a new article on my updates. I’m now using a LCD screen and finally got rid of that heavy TV. I’m not aware of a service that sells the software completely setup for you. The longest part of the build process was configuring the software and emulators.
When you switched from CRT to LCD, did you add a shader to keep the CRT look, or was that already built into the software you were using? Just getting started and will likely skip looking for a CRT based on what I’ve seen for availability and pricing these days.
When I switched from CRT to LCD, I didn’t use a shader. I went to a local boat plastics company and had them make a plastic piece to fill the gap around the monitor. Looks really good!
Big buck hunter and Mario donkey kong can u use the multiple controls on one system?
I have a ninja assault arcade game. cannot line the guns up no matter what….great job on the mame machine, found yours by looking how to build one, responding to Kendrick post, was hoping you might have some insight to what might be hindering my alignment of the guns on my Namco ninja assault game. thanks in advance….lee
Get into the test mode and go to calibration. If after calibration the guns are still off by let’s say and inch to the right, get back into calibrate screen and this time aim your gun an inch to the right (or maybe left) of where it wants you to aim. See how this affects your play.
I’m actually looking to sell my classic Super Pac-Man machine. Anyone interested?
Mike, do you still have your super pacman machine?
Do you know where I can get a control panel lie this one? I’ve looked everywhere and can’t find them
Thanx for this informations, i will use them to build my machine! But I can tell, nowadays you can build a machine like this with almost ZERO costs (if you have the time, but not the money) , people throw away all the stuff you use for it.. for controllers also go to scrapyards, fleamarkets or look into electronic-store containers. Then use a free Front End. Also i want to weld a rusty crazy Cabinet in MetalSlug look.
D.I.Y or die! – Cheers from Switzerland
Hey Kendrick,
How did you learn to fix video games? From on the job training or from some sort of technical school?
hi, I really admire what you have made , I started to build an arcade myself and I can’t seem to find a way to make dragon’s lair work , could you tell me how you did it please ?
Yeah that one was one of the more difficult games to get running as I recall. Try out various emulator versions and ROMs until you get a combination that works.
The recent builds of Daphne check to see if you own a legal copy and then download the version they want you to use. If you have old versions of the roms and video files you can try Daphne versions before 1.0
Thanks for putting this together. It helps noobs like me get my feet wet and build a baseline for what exactly I want to do. Share more projects like this. Curious to know if you set up your own mapset for the buttons or you used a pre-configured one from an i-pac or some other device.
Incredible job ! I had the idea of building something like it , but the resources and experience shared is highly appreciated and will help me a lot ! Have a nice time with your buddies playing your favorite games and think of any beer holders around this magnificent machine !
Thanks!!
Pingback: Will We See Retro Game Options? Emulators? - Page 2
I have completed my setup. I have an external power supply which runs into a power pack where my pc connects into. How can I get my desktop to boot up from turning the hardware switch to the on position on the external power supply? Right now I toggle external power supply on which powers on power pack inside case, which fires up all fans n LEDs, I just need my desktop to boot up too instead of me having to stick arm into cabinet to toggle on desktop. Any suggestions?
I used the PC as the master control for everything else on the powerstrip, so I have to open up the coin door and hit the power button which will in turn power up everything else.
I’m late to the article, but you could probably wire a switch to the power button pins on the motherboard and have that accessible on the outside of the cabinet.
Just go into the bios settings and enable resume on power up
I have the same power strip that you showed. I use my PC as the controller. It will shut off the Tv fine but won’t turn it back on. Any thoughts? It is a newer LCD tv instead of a crt.
Depending on the pc you are using, there are power options that you can tweak that tell the pc to turn back on automatically after power has been lost. Which allows you to have an external switch mounted in an easier-to-reach location that would turn on your pc. There are lots of options. You can install a backup power supply that connects through usb to the pc that tells it to initial a shut down sequence when power is lost, that allows you to again mount an external swith for power. Good luck.
Hi there my name is Frank I was hoping that you could help me ,….I have recently bought a PAC 2 Arcade Game ( stand up machine with joystick buttons coin slot etc …..which has 60+ games on it I believe it is a Chinese retrofit some of the games that I want are not on it and I’m hoping to get the 120 + game pack ,….is there a way of converting this 60 game pack to the 128 I have the machine the box the controls everything and it works now I just want to put on more games
This is interesting. I’d like to put something together but with an MCU board instead of a PC. The boards I have are from Parallax, and have VGA and Composite video output with regular audio, and we can load from Micro SD card. I’d like to try to get a coin uinit working with it, might be simple like a coin might connect the circuit and the board can pick it up on GPIO input to see when a coin is inserted.
Another thing would be the controllers, I’d probably need to find one with individual outputs, where you apply voltage to all potentiometers and then read back voltage from the key/button outputs. I’m not sure if they make them like this anymore. It’s all USB stuff.
I love your cabinet!! My wife and kids are bugging the hell out of me to make one like this for family fun… yeah right lol.. I have never use MAME and I am having problems getting it to work. has something changed over the years since you made yours to now. I have spent over a week trying to get even one thing to work. They make it sound so easy but I’m finding it very confusing with the amount of miss-information out there about it. I know that I can do this without hesitation but I don’t want to start until I can get the emulator to work with a computer on a desk first with a nice frontend. Is there any help you could give me on how to set this up. And just to let you know I do not know much about command line computer work.
Thanks Shea! Glad you like my cabinet. I think that’s a good first step. Hopefully all my links still work above for downloading the software you need. Let me know if that’s not the case. I’d certainly start with MAME. Cheers
Hey greetings, im a huge retro gaming fan, and I really want to build my own Arcade System, is there any chance that you can help me with it? with instructions, pictures, most of all the wiring part, I really appreciate your help.
Are you in the business of selling an arcade system like this one?
No sorry! One and done
Hey Todd, awesome job, I have decided I want to make one of these but it seems all the websites seems to have been sold and or gone out of business.
Also I noticed you didn’t put any specifics into the software end of how you set things up, if it just like a normal. PC and boot from the emulators or did you have an interface set up to auto boot to a menu system?
Hey Todd,
A good friend just gave me a machine similar to yours. I am a complete(!) noob to mame’s and this tech. I played these games many years ago and that’s about it. Anyways, on the free machine I have, there are thousands of games, and MAME like you mentioned. There are also different control systems (Atari and NES, etc) with their associated games. The problem I have is a bunch of the games don’t work. Some load but don’t function. Some just have a black screen. How do I go about digging into them and repairing or reloading them? Also, would it be helpful to hook a mouse and keyboard up before I try to attempt anything?
Thanks and Cheers!
Chris
Hi Chris, My cabinet has a pull-out drawer under the controls that has a keyboard and mouse already connected. You will need that for sure. It’s pretty common that a game ROM might not work. A lot of times you’ll need to configure the controls for a specific game. Sometimes the ROM just doesn’t work at all. Upgrading the emulator or finding a new ROM is the first thing you should try. But sometimes the ROMs are not fully supported by the emulator or your computer is just too slow to run them. It’s a process but hopefully a fun one. Good luck! ~Todd
I’ve plugged a keyboard and mouse in. I see new areas where I have access like in any windows based machine. Where do I go from here?
How do I update the emulator?
Hey Chris, I’min the process of building my own cabinet similar to what Todd did (love this article, Todd). To update your emulator, you’ll need to download a new version from the internet. EmuParadise is a great site for emulators and related resources. It’s unclear from your post if your cabinet is built on a Windows machine or Linux, or what; but in any case, you’ll need to be able to get to file system to install a newer version of the emulator and update any ROMs that may be outdated/malfunctioning.
Great job! I am also trying to do a project much like this. This will be helpful
Thanks! It was a very rewarding project. Good luck!
Hey Todd, I’ve been toying with the idea of building a mame for years. Can you tell me the total cost of building one from scratch, and maybe have you a link to plans to build a cabinet from raw materials? I’m in the UK.
Ps great site, well written and very interesting!
Matt
All the prices are in the captions. Cheers
Greetings Todd….thanks for all the wisdom! Question – could you not use a flat screen computer monitor as opposed to the 27in tv? I’ve got an old 4-player NBA Jams cabinet that I’m hoping to convert.
Also, could you use a Apple OS (Mac-mini perhaps) instead of Windows?
Yes of course! It’s just a matter of creating a nice bevel to go around it to fill in the gaps. Good luck!
I am curious how things turned out using a flat screen as your monitor. I really want to do this project but finding a 27″ tube TV is really proving to be a pain in the butt.
Hi there,
I ordered a spacie machine online. I have an issue where some of the games that i try to play.. The screen is cut in half and swapped over. So the right half of the screen is on the left and the left is on the right. Pretty much making it impossible to play the game.. it tends to be the newer games. eg – marvel vs capcom, street fighter III etc.
Any ideas on how i can fix this?
Thanks
Phirum
If using Mame you can configure the specific button controls used in each game. Check the Mame docs for more info on setting it up.
You are the man todd much appreciated from novices like myself to come across this article for the building blocks of a mame arcade game. Love your work
Regarding the MAME emulator did you use XP or Vista? I been reading that XP is the better way to go.
It’s running XP.
I just wanted to add to your list of front ends. Another great free front-end is Hyperspin. And of course you would want to add Rocketlauncher to the set up as well. These 2 programs together make for a really nice front-end.
Although it is a bit complicated to set up, there a number of how-to videos on youtube to aid you. I will give one piece of advice, the Hyperspin download comes with an old version of Hyperlaunch that you won’t use (Rocket Launcher replaced it). Simply install the new rocket launcher folder in the hyperspin folder and run the transition tool from the Rocketlauncher download.
Great article! I found the information on hiding windows very useful for my own arcade.
Thanks for the info!
Sweet cab. Might I recommend pang and pigskin as mame games you should try with friends if you haven’t already? Some of my favourites.
where do you find authentic ROMS that have not modified the game?
I’m really impressed by the finished cabinet, looks really good Todd! Found this site at random because I was looking to build something similar but like the two player table version arcade games. This article has given me many great ideas, thank you. Caris.
looks great – i bought a stand up mame street fighter – but i’m not too good with maintaining it! a couple of the buttons aren’t working – i think it’s a pretty simple process to re-allocate them but i’m not sure how.. don’t suppose you could advise? would be grateful!
This is a sweet article. I was wondering, could I use a Raspberry Pi running Linux instead of a full windows computer in a cabinet like this? I imagine I’d still need a couple ad-ons for the Raspberry Pi to get it sufficient, but your judgement is better than mine.
Thanks! I have a friend that has MAME running with good results on a Raspberry Pi 2. I certainly think it’s worth giving a try given how cheap those devices are…
Would you ever make one and sell it? I want one just like yours but can’t find one on the market
Thanks. I’ve been asked by many to make them but I’m too busy creating mobile games.
It was a fun project though!
Hey, this was a great read! I have been interested in this for a while. I have one question that you may or may not be able to answer for me.
Is there any possible way to have the machine on with the selected game’s demo and intro videos playing before a player decides to play?
How much did this cost in total, in dollars and time? Also, would it be possible to do this on a Windows 8 or 10 machine?
I created a mame cab out of an NBA Hangtime machine. It runs Maximus Arcade frontend on a Windows 8 PC hooked up to a 55″ mitsubishi rear projection. 4 player, 6 buttons each and a trackball. No driver issues.
I recently bought two SanFransico Rush games. I’m having trouble linking the two together. Not sure if I have the correct parts. What do I need?
I have access to 2 free arcade cabinets, Rampart & an original Golden Tee. Would you recommend getting one or both of these, then gutting them for a preassembled starting point or are the controllers built specifically for certain cabinet sizes?
i would suggest getting both
have seen a few images of a golden tee, its quite big on the front panel, so could be converted into a 4 player mabye?
not sure on a rampart cab size, but mabye have one for gun or fighting games and the other for games that require 3 or more players would be my suggestion.
i bought a “police trainer” cab, and converted it to a hdtv setup and it has 2 super woofer speakers in the bottom, a surround bass box in the middle, and also takes use of the top speakers which came with the cab, and i use a g27 on it for my pc and ps3 games.
i do have a double joystick thing which fits in the unit also, but i take that to events i do.
could be worth you having a look at what budget you can set to it and work from that, and see if you like the setup.
for me, my plan was for me to hard wire a coin mech and use it at home as a personal savings bank via mame.
that way it would emulate the real-deal cabs of arcade by inserting coins in a 9 second panic to continue, but also saving money at the same time haha
hope this helps
Todd, thanks for the great info. Did you mount your tv sideways or normal(horizontal)
It’s mounted normal.
I bought a cocktail table arcade unit, but the stickers on the top were cut badly. The company I bought it from said they just installed the electronics. Does anyone know where I can get stickers for the top and sides?
I’d also like to change out the motherboard for the 412 games instead of 60. Any ideas?
Gameongrafix.com
Todd, great info. Thanks for sharing. Your system rocks! As a software engineer myself, I roll my eyes with all of the folks asking for free support!
Great job on this. Question: Will several emulators work with the same front loader? Can you customize it so it pulls roms from the correct emulator?
thanks
Different versions of the same emulator? That I don’t know… I’m thinking the front loader I use doesn’t support that but I haven’t upgraded in a while.
is it possible to get the coin slot to work with the pc so that someone must put a coin in to play?
I’ve been wanting to open a barcade( bar/arcade) for a while now, and I’m curious, say if i built 200 of my own rom playing cabinet arcade machines… Is it legal to charge people to play these or let the public play them free after buying food or drinks? Because I know emulators play copies of original games that are copyrighted, and I’m pretty sure nintendo, among other game developers don’t take lightly to commercializing their copyrighted games, etc. But while reading this article a couple of things comes to mind like MAME for instance, is this software open source? Is MAME an emulator company that makes money off running copywrighted material? And mostly, could I get in legal trouble by an auditor if I opened an arcade running several machines Much like the one you’ve built in this post?
Mame is free and I think just went open source for use in other projects including pay projects. But yes, the games are the problem. I think you can buy old broken ones for cheap and keep the boards and roms in the back (or inside the machine) and you MAY be ok. I think you may have to have one physical copy of the rom boards for each machine you have playing that game. Even so, you probably would get harassed fairly often I suspect.
As an establishment owner it’s probably safer to go with licensed machines. You can try websites like:
http://www.moneymachines.com/index.htm
But at $750 to thousands per game, I see it hard for them to make their money back these days.
Very amazing Todd.
Quick question…do you know if this exact set up would work with a X-Arcade USB controller?
Yes I use that exact setup, maximus arcade, windows xp, x-arcade stick. works awsome.
http://damascussteel.webs.com/smallcabinet.jpg
I bought the Maximus front end and I have a tankstick
The maximus website is a joke as it is years out of date. What specific version of mame are you running. Is it 32 or 64 bit? 32 bit is no longer updated so I wanted to use 64
Is it mame or mameui ? I have romsets 139 and 153 with updates to 158
Pingback: Build Your Own Game Desktop | Gamentot
I built my arcade from your site also, I used everything that you did and had wonderful time putting it together with my son. I did move and had to use another computer. And now the controls don’t work on my SlikStik CO2 Unit.
I was wondering if you have the SlikStik Utilities Installation CD or know where I can get them?
I do have I-Pack Software for Win 32 Post
I do need SlikStik Files for CO2 Unit Post
and I do need SlikStik Mame setup Files Post.
Thank very much for your time.
If anyone else is reading this post and you have the files, that I can use, please contact me.
rhand@nbnet.nb.ca
Do you know if anyone has built a stand-alone console/enclosure including a complete control panel and PC that connects to a flat screen/sound system via A/V cables (component or HDMI)?
Thank you. I love your article. I was in the coin-operated games business for more than 25 years. Before and after that, I was in the computer business, both hardware and software, with an expertise in database design and programming.
Nice work, I built an Arcade cabinet back in 2001 and thought I would offer an idea regarding the TV and power. You can take a small drill bit and drill a small hole in the bezel in front of the IR port on the TV so you can easily turn the TV on/off. You can’t even really see the hole unless you really look for it.
Hello, my name id Dave,
I would like to make this item and am currently ordering the pieces for the machine. Could you please tell me what model the tv is?
Many thanks,
Dave
Well I think this looks absolutely beautiful and professional, but u said u wanted a simple economic plan…simple I agree, economic not so much…u ended up spending around 1300 dollars in that, plus work…that said it kicks ass no doubt. …u gave me some good ideas, I am planning to build my own system, but expect to use stuff I have around and only spend around 400 – 500 euro, using an old arcade cabinet I got from a junkyard striped down and painted and redecorated…
Yes you can save a lot of money if you can find an old cabinet. I looked around and couldn’t find one so your lucky. Good luck with the build!
Todd,
Great Article!
Just bought a unit called Macade. Over 10,000 games on it but the compaq computer inside looks pretty old. How can I backup the system in case the hard drive dies?
Thank you
Todd,
Great article! I was googling about starting a project like this and ran across your site, I recognized the name immediately (i’m an iOS dev too) and was like “hey that’s the guy who made white noise (long time customer!).
Cheers,
-Charlie
Todd
I love your idea and wanted to know if we can tack new games is teeken 6-7 and put it in your system?
Can you do that?
Sharon
I want to build a hand held arcade which I need a tablet for it but my problem is the buttons, how can I link the buttons to a tablet or I can do a mini arcade like a size of soda can then I gain I don’t have a small engine like a PC that will run it.
A tablet is usually much bigger than a handheld video game machine. There are great alternatives that are as small as a gameboy. Of course, if you want to just buy a hand held emulation machine you can buy a used caanoo (ya thats what it’s called) or there is the Nvidia Sheild portable, something from JXD or a whole host of other options. You can even turn your old phone into a console with a moga controller.
Found your article very interesting. Thinking very serious about doing a project of my own. Im sure you had to learn a couple things the hard way just because you didnt have someone that already wrote an article such as this explaining the steps taken. But my question is how much did the project costs you when it was all said and done?
Or what would you estimate the costs would be to duplicate this project a second time having the necessary steps already known now?
I am also building mame gaming console like you I do every thing as you done but buttons gears (joystics) not working please help
You usually have to configure the emulators to work with the joystick. Each emulator is different and if you have many of them it’s pretty time consuming. You will have to consult the documentation for each of your emulators individually to get it working with the joystick.
Hi, I have all the emulators on my computer from Game Boy all the way up to Wii U. I know how they all work. I always wanted to build an arcade witch i know is not that hard, but how do you get the coin door to register with the emulator when someone puts the quarter in?
As he mentioned in the article, the coin door is only for show and other buttons can take care of that. You can purchase a working coin door and wire it into an ipac or rewire a button in a pre-made joystick. That being said, emulation is already a grey area in the eyes of the law but usually not enforced when it’s just for personal use. However, if you were charging for games you do not legally own, that could put you in some real legal jeopardy.
Joel it is not elegal.. to put a coin slot to make money. Because you can’t really own an arcade game. It is not the same as buying an actual console game. Wether you buy the actual arcade or make an arcade is the same thing. What would be actually illegal is if you were coping the arcade software and selling it. Not buying or building to sell. I actually make the arcade to and sell them. I’ve never had any problems.
Todd- you say in he cabinet portion that you an purchase the plans for creating one. Any links would be much appreciated.
Do you think I could put an LCD monitor instead of a CRT in the cabinet?
Hi Todd, I came across this and hope you might be able to help. I broke three rules of my husbands man cave:
1. I was in the mancave
2. I was cleaning in the mancave
3. I accidentally unplugged my husbands MAME Cabinet while cleaning near it and now when plugged back in my son can’t get it past the setup page. Any thoughts, or suggestions on what could be wrong and how to fix? Thanks
Oh no! I’m guessing someone left the Windows setup CD in the machine. Try popping that out and reboot!
Todd, this is awesome. I am in the process of planning out my build of a arcade gaming table. Not the stand up ‘street fighter’ style cabinet that you have beautifully built, the ‘Donkey Kong’ glass topped table that you could place your fizzy beverage on the glass and then go crazy on the buttons of Asteroids! Anyway… epic post. I have book marked it.
Thanks so much and best of luck on your project! You always need a place to park a drink
How did you connect the pc to the tv? My tv doesn’t have a vga port.
My graphics card has s-video out.
i don’t have any experience with these machine arcades mostly vanished early in my child hood not that ive never played one but im a huge gamer and wanted a piece of gaming history so im buying street fighter 2 the world warrior arcade game this week and i wanna know could i use other street fighter games on the same machine? like lets say street fighter 3 or moral kombat?
Todd,
Thanks for posting. I have a dream arcade upright that I want to upgrade with a Win 10 PC so I can use it for other things like Oculus. I live in NoVa do you know anyone that could help with this project?
Todd –
Came across this site as I was trying to figure out what to do with my old 27″ TV, and I am beginning to try to build a machine and cabinet myself. Can you share the hardware specifics on the PC and video/graphics card with me?
Any PC that comes with Windows XP SP3 from factory can play older system emulators from Atari 2600 up NES roms. Of course, the faster the computer processor, more ram and better video card will give you better playing experience.
If you want to play N64 roms, then you need a newer computer with good amount of ram and a video card will help get you better video quality during your game play.
Nice work todd
Pls help me I want to build a driving arcade game I have every thing but my problem is to insect coin if I’m using need for speed ea games
I wonder if the businesses that will sell you a complete arcade game would allow you to buy a board loaded with however many games you want? This seems easier than trying to set up emulators on your own computer.
Doubtful. If a company is viewed as profiting off of copyright material that’s going to spell trouble. Nobody would take that risk. There are good hardware vendors for cabinets but they won’t come loaded with ROMs.
A business will not be able to sell you a system with the ROMS installed. However, they can sell you a system with the emulators installed and you will then need to upload your own ROMs to play.
Hi Todd, I think this is an amazing project and am looking to do something similar but from scratch. I tend to draw and paint and would like to design it after i assemble but my question is this. Do those softwares run gameboy color and advanced roms? I want to do a Pokemon one as I think it will an original and AMAZING piece of equipment to have! Please let me know if it is able to run gameboy ROMS
I’m not sure as I don’t have those emulators. The arcade controls use standard keyboard and mouse so if an emulator supports that it should work.
Look up raspberry pi 3 and RetroPie
This setup will absolutely run Gameboy Color and Gameboy Advance games with ease.
Todd,
Excellent work. I have an old Phoenix cab running MAME through my pc. I built with Joystick + 4 buttons, rollerball, and joystick +4 buttons. I can only get my roller ball to work in the top menu, and not in any of the games. Golden Tee is a challenge with only full swings, and Centipede is impossible with only 100% L-R-U-D movement. Any thoughts on rollerball compatibility with MAME? Do I need a separate Golden Tee emulator?
Hi Todd. Awesome man, just awesome. I am wanting to start with a Mame System for my arcade as the local guys here are insane with their prices. I found out where to buy the Ipac 2 or 4 but only huge problem is what version of Mame to use and where to get the complete version. I hope someone can help me with that. Thank you.
Can this setup be used with guns? Looking to have area 51!
I love the idea to add a sub woofer to your arcade sound system. I have been wanting to make our bonus room a fun place where our kids could live. I definitely think that we should have an arcade machine setup downstairs that could make it a fun place to relax.
Great stuff, I have been following MAME development since the 90’s and built my own arcade 10 years ago.
For all of those people that are not sure where to start I recommend downloading MAME, a few ROMs and try in out on any PC or Laptop. You can play the games using the keyboard while getting familiar with emulators.
Are there any cabinet options for a 36 inch tv? Someone is selling a trinitron for $15. Or is that too big?
Hi Todd, nice work!! I just wanted to let you know that I know a guy who makes beautiful sit down gaming consoles for a very reasonable price. Seeing that you’re too busy yourself to make them for others, I’d be happy to put anyone who wants one in contact with him.
I’m looking for a stand up MAME machine with two steering wheels. Can your friend do this?
I do have a 27″ Toshiba and cant find printable cabinet models to make it fit.
can you share that? ty
Hi, can you share your Toshiba model number? im curious to compare with my i have. Want to see if it will fit
Toshiba 27AFX54 CRT
thank you
I am looking for giving a small contract to someone to build a STM 32 bit emulator customized to our needs. Can anyone provide some references to folks who may be interested in doing a paid project?
I’m looking for someone in Houston, Texas that can repair a home made arcade system that uses MAME/MALA. Many buttons and controls on the game have stopped working as well as the roller balls and the person who built it keeps blowing me off to come and repair it.
My upcoming arcade game project is Brute IK3, Fantasy Fighter, Virtual Circle, Mean-Streak, Arctic Thunder Blizzard and Wreckage Deluxe.
Atari Games / Midway Games
Hey, I’m planing to this as a project for my school subject in Australia. And I would like to know where you have brought the circuit board and other electronic systems items or did you Build it by yourself?
My email
nag0019@mwsc.vic.edu.au.
Thanks, I love this idea.
Todd,
Awesome guide. What are your thoughts on using a monitor vs an old tube TV?
Hope you still check this..
Thanks! I’d use a monitor today.
I built one using batocera lonux as the os. Works grate. The cab is made out of plywood. Took about a year to build. I used USB powered LEDs for the Marquee and play some glass and stainless steel for the cop. I just wanted to say thank you because I read this article a couple years ago and it convinced me to build one.
Hi Todd,
Great article – just discovered it. I was unsure on whether to base a machine around a raspberry pi or a PC. From what you’ve written, I’m leaning more towards PC now. However I had a couple of questions I wanted to ask if possible:
1) Do the front-loaders allow you to switch between emulators without issue? If so, do they also allow access to games that aren’t accessed through an emulator for example .EXE files?
2) When it comes to controllers that differ from the normal arcade sticks/buttons (such as the trackball, guns etc), do the emulators have to be mapped every time a certain game is loaded, or is it possible to map them so centipede/defender etc automatically run via trackball, while pac-man/space invaders runs by conventional stick use?
3) How do you upload new Roms onto the system if you acquire them? I’ve heard some have a setup where said roms, if included on a USB, automatically upload when the USB is inserted. I just wondered if you knew anything about that, or do you update the romset via wifi, or do you have to physically open up the cabinet?
Thanks!
Thanks! 1. Yes, I believe the front loader just waits until whatever process has launched terminates. So if I launch Mame it waits until you exit out. A button on the controller performs the Alt-4 windows quit command and immediately jumps back into the front loader. 2. I never had to map those games specifically as they are already configured to work that way by default. The only time you have to map something is if you want to change the default behavior or add extra buttons to do the same thing. 3. I always add ROMS by exiting out of the front load and copying the files or doing so over the network with a shared Windows folder which is the easiest way.
Do you know of anyone who can set up and sell the front loader software so that it could be copied into the M.A.M.E. machine? I’ve given it a try in the past but it never worked right. I’d love to have an arcade cabinet that could play not only M.A.M.E. but also some of the game consoles I’ve seen in other emulator arcade machines.
Software configuration is the hardest part! I don’t know anyone that offers such a service.
You did a great job of explaining how to build an arcade machine! It really helped when you talked about obtaining an emulator to run the arcade games! I’d be interested to learn more about the emulators actually work. Recently, my girlfriend and I went to an arcade for date night and we had so much fun!
Hello. Do you think we can add joysticks to play some specific games (like the double sticks for Karate Champ or rotary sticks for Ikary Warriors)?
Thanks you for your time and happy gaming
Hey Todd,
Awesome looking setup! Quick question that you may or may not know but for the classic games, can they be setup with an actual ticket dispenser ? I got my hands on a somewhat older arcade machine that has missing software and im going to load windows onto it and run some of the same setup you got going on here, but the machine I have now is a six person setup with six coin slots to accept coins and ticket dispensers as well, I see you have yours setup to accept a coin input from your front buttons but was there anything about tickets as well?
Pingback: 5 DIY Tech Projects to Learn About Electronics
Pingback: CES 2020: Personal Arcades, Outboard Phone Displays, and Dystopian Drones - TidBITS
Pingback: CES 2020: Personal Arcades, Outboard Phone Displays, and Dystopian Drones | Games Stories
Thanks for exclaiming that the PC is better than the original hardware because the Pc has a better emulator. My son wants to build hid own arcade game this summer as a school project. I will hire a technician to help him install the PC and other components so he can have it done on time.
Pingback: 11 Fun DIY Retro Arcade Machines You Can Make Too
That’s a fine looking machine, Todd… great job! I finally built my dream cabinet this past summer. It’s very satisfying to take something that’s in your head and make it a reality. I used 3/4 inch birch plywood because I despise MDF… which is basically thick cardboard. I opted for pocket-screw construction because I hate seeing ugly screw heads all over a nice looking cabinet.
It features MAME (with almost 4,000 arcade titles), of course and about 50 consoles dating back to the dawn of the home computer era. Well over 50,000 games by my estimation. I even included the complete Doom series since it sparked the first-person shooter craze.
There’s also a jukebox loaded with all my favorite music, and you can even watch TV on it!
The cab features wi-fi and bluetooth capability making it super easy to add ROMs, music files, etc. There’s even a LAN port in case the wi-fi gets squirrely.
An HDMI output allows me to also display it on the big screen so everyone can see all the action. The sound comes from a set of premium PC speakers complete with subwoofer, and it also plays through my stereo when the HDMI output is used. So much bass that you can actually feel the punches and kicks on fighting games!
It’s powered by two Raspberry Pies… one running the game emulation and the other is a Linux desktop workstation. I chose Recalbox rather than Retropie because it seems to work better with the trackball games.
The display is a 24″ Vizio smart tv. No power return, but I drilled a small hole in front of the IR sensor so the remote will work. It’s virtually invisible on the black bezel.
I used an X-Arcade Tankstick that I already had for the controls plus a switched USB hub for connecting console controllers for the purest gaming experience possible. I like shooters so I added an Ultimarc Aimtrak recoil gun as well.
Other features include a hidden HP Omen gaming keyboard, a quick-change marquee system that I designed, and two storage compartments for all the extra controllers and such. The coin door has a lighted dummy coin slot and return but it looks like the real deal.
The lock is actually a keyed power kill switch to prevent unauthorized use. Neodymium magnets hold the coin door securely shut. Everything powers on and off like magic with an RF remote control.
All lighting, including the marquee, coin slot, and rear accent lighting change colors and have strobe and fade effects to suit your mood. There’s even a blacklight on top of the machine as every arcade needs one.
It has a natural wood finish with carbon fiber t-moulding and accents. Sounds like a weird combination but it looks fantastic. No side art, but it has various gaming logos displayed on the front. I went all out on it and I’m so glad I did! All tolled, I have about $500 invested in it give or take. A bargain compared to those flimsy Arcade 1Ups they sell at the Walmart for about the same price.
The whole project was completed in six days working about four hours each day. My dad has a small woodworking shop which helped immensely.
Thanks for sharing! Sounds like you’ve built the ultimate arcade. Send me a photo when you get a chance.
I’m in the process of updating my arcade machine to a Mac Mini running Windows, 28″ LCD monitor, and new bezel to fit. The TV is just too difficult to use with it’s low resolution and also way to heavy to move around. Cheers, Todd
Hey Todd, Thanks for this awesome guide. I am looking to build one of these myself, though I have a slightly different idea and wanted to know if you think something like this is possible:
I’m looking to make an arcade machine that plays just one game, A game I would be making myself. nothing crazy, but an old-school 8bit style game. I want to make it so that you actually need to pay to play. And the main thing, is that if you beat the game, I want it to print out a receipt. Is this something that I could likely do, or should I not waste my time. Warm regards,
I don’t see why you couldn’t build that! My arcade machine doesn’t have the coin mechanism but instead uses a button to trigger a coin being inserted.
Hi Todd!
I came across this post while searching for home arcade repair. We have an x-arcade machine that has 1,000’s of games on it which I purchased 10 years ago from a company called Ohio Arcade Cabinet (they are now out of business). After my son’s 10th birthday party a few years ago (and lots of little boys playing it), we found that we cannot access the games for some reason. I’d like to get it working again. Do you have any recommendations on where we can send it to be fixed? We are in Michigan.
Thanks!
Mary
Hi Mary, most of the arcade machines have a PC on the inside. You might be able to bring that in to a computer repair shop and see if they can service it. Cheers, Todd